Your Knitting Kit Essentials
- learntoknitonline

- Jun 14, 2021
- 4 min read
When you start knitting patterns you soon become aware of all the 'stuff' that is required to have in your Knit Kit (not an official knitting term). In fact just walking into a yarn store can feel overwhelming with all the extras dotted about between the yarn and the needles.
This 'stuff' in the knitting world are known as Notions.
So let me break down for you what, in my opinion, are the essentials for you to have to hand when knitting...

Not photographed but a Project Bag is an essential - this doesn't have to be anything fancy but a small tote or craft bag where you can keep your knitting project safely with all these notions to hand - definitely better than it all becoming a mess in your backpack/handbag. I use a small wallet with each of the below essentials in, which I throw into a small drawstring tote (depending on the size of my project) which then goes in my backpack when am travelling anywhere.

Scissors
This will be apparent from your very first knitting lesson, especially if you learn with me, that you need scissors. Scissors are necessary for shortening your overly long tails (keep it between 2-4 inches for easy finishing) and of course for cutting your yarn once you cast off / finish your project, or even sometimes a section (some jumpers are knit in multiple pieces, necklines can be knitted separately...the list goes on).

A Tape Measure
It is always important to have a tape measure to hand when knitting as many patterns will ask you to knit to a certain length for each section and of course you will need a tape measure to check the gauge in your knitting swatch before you even embark on that sweater, hat, pair of socks....right!?
For those of you reading this and wondering what a swatch is - that blog post is coming up next or take my Lesson 1 Beginner Knitting Class!

Stitch Markers
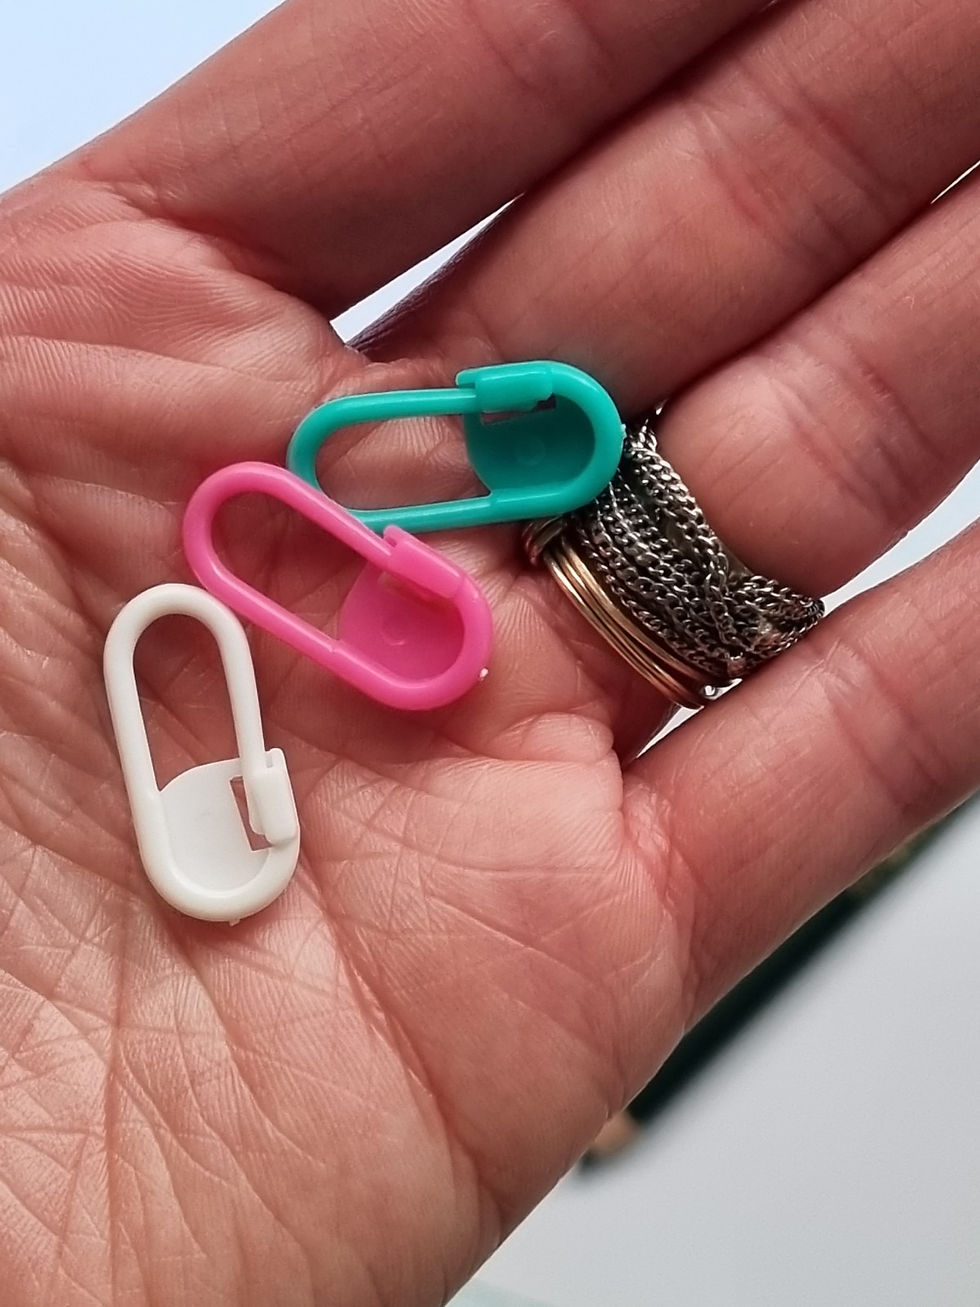
These handy little paperclip looking things are to mark sections of your knitting in certain projects. For example you may be knitting a Scarf with a Garter Stitch border aka the first and last 4 stitches of every row are just knit, whereas the stitches in-between may be a different stitch pattern altogether, Moss Stitch, Stockinette Stitch etc.
By placing a stitch marker between the 4th and 5th stitch at the start of your row and between the last 4th and 5th stitch you will have a visual marker that signals when it is time to switch your knitting sequence, ensuring you can just relax and knit .
The markers sit directly on the knitting needle and are simply passed from the left needle to the right needle, their job is to 'wave' at you to alert you to the fact something is changing, usually a different stitch combination.
I am going to film a short tutorial video on this soon so if this explanation raises more questions, hold tight - I'll demonstrate.

A Knitting Needle Gauge
This handy little tool helps you identify the size of your knitting needles - sometimes the indicating mm size rubs off the side of the needle or sometimes it's not written on them at all, just indicated on it's packaging. So a knitting needle gauge makes all the mystery disappear and as you can see, most come with a little ruler too! Mine has a lovely transparent section so I can measure swatches easily.
They cost a couple of £/€/$ and are often found at the counter in a knitting shop. They can come in a variety of designs too so you are bound to find one that you like. I own about 3 and have them in various project bags.

A Row Counter
Many knitting patterns will ask you to keep track of how many rows you have knitted in specific sections, a jumper may say "Repeat the last row 85 times" before the next instruction.
How to count and record knitting rows is more of a choice of method than a specific object.
You can find little row counter gadgets that sit on the end of your knitting needle, designed for you to manually you turn a little counting wheel which then changes the displayed numbers to represent the amount of rows knitted or you can, like me, simply use a pen and paper.
I scribble a knitting row tally and notes of where I am in my knitting pattern on paper which I then shove in with my knitting so next time I pull it out of my project bag I can see which section and what number row is next from my notes.
You can also use your notes app on your phone too just make sure you title it clearly so you can find it easily!

A Tapestry Needle Finishing rather conveniently with a finishing tool, the tapestry needle. Once you have finished your knitting project, no matter what it is, you will have ends to sew into the 'wrong side' - the side the world won't see.
Tapestry needles have large 'eyes' for yarn to go through comfortably and are blunt ended needles that can go through the backs of stitches easily, allowing you to weave your ends (or tails) in easily and securely.
My tapestry needle of choice has a slightly curved point, I find it helps me change direction comfortably so I can sew my tails in in a circular, random method which helps secure them out of sight.
So there we are, the Knitting Bag Essentials checklist for next time you wander into a knitting store. There are of course a lot more little notions (like wool combs, pom pom makers, pilling machines, needle tip protectors etc etc) but these are the knitting accessories you will most commonly need and benefit from.
PIN this post and keep it handy.

If you are a beginner knitter or simply want to brush up on your basic skills, check out my Beginner Knitting course or pick the specific skills class you need with the Single Knitting Class options.
Be sure to sign up to my mailing list, The Loop, to be notified of all and any new classes and tips videos.


Comments